Have you ever stared at your kitchen and wished it could look brand new without spending a fortune on a full renovation? Vinyl wrap offers an easy, affordable, and stylish solution to transform your kitchen in just a few hours. Whether it’s your cabinets, drawers, countertops, or appliances, a high-quality vinyl wrap can give your space a fresh, modern look. Many homeowners wonder if they can take on this project themselves, and the good news is, with the right preparation, tools, and guidance, you absolutely can. This article will guide you step by step, helping you achieve professional-looking results while saving money and adding a personal touch to your kitchen.
Before you start your kitchen vinyl wrapping project, gather these essential tools to ensure a smooth and mistake-free experience:
Having the right tools on hand will make your project easier, faster, and more professional-looking.
Proper preparation is the key to a successful vinyl wrap. The wrap will only stick well to surfaces that are clean, smooth, and free of dust or grease. Follow these steps:
Taking the time to prepare your surfaces properly ensures your vinyl wrap adheres perfectly and lasts longer.
Measure each surface accurately, and always add an extra inch or two on each side for adjustments. Carefully cut the vinyl wrap according to your measurements to ensure a perfect fit and reduce waste.
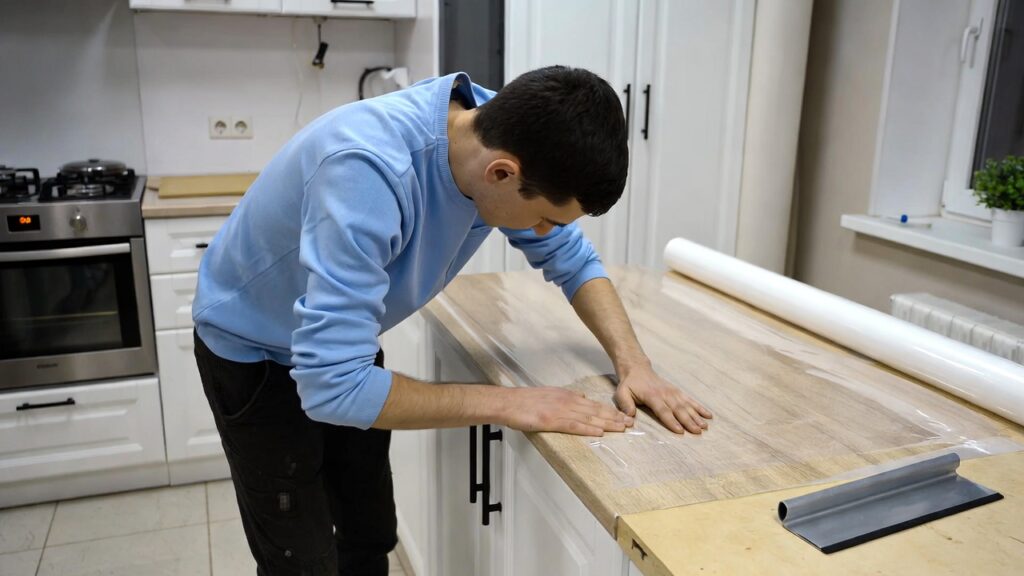
Peel off a small section of the backing paper and start applying the vinyl from one corner. Avoid peeling the entire backing at once, as this can make the vinyl difficult to handle. Work slowly and align the vinyl carefully to avoid misplacement or wrinkles.
Use a squeegee or plastic card to smooth the vinyl as you apply it. Start from the center and push outward toward the edges. Take your time to remove all air bubbles for a flawless finish.
Gently use a heat gun or hair dryer to soften the vinyl, especially around curves and edges. Applying heat makes the vinyl more flexible, allowing it to stretch and conform perfectly to corners and contours. Move the heat source continuously to avoid overheating or damaging the material. This step ensures a smooth, bubble-free finish that lasts longer.
Once the vinyl is in place, carefully trim any excess with a utility knife. Take extra care around corners and edges, ensuring a crisp, professional-looking finish.
Reattach any handles, cabinet doors, or appliances, and inspect your work for bubbles or wrinkles. Use a heat gun to fix small imperfections, and step back to admire your professionally wrapped surface.
Even a simple DIY vinyl wrap project can go wrong if you’re not careful. Avoid these common mistakes to ensure a flawless finish:
Dirt, grease, and dust can stop vinyl from sticking properly and cause bubbles or peeling later. Always clean and prep every surface thoroughly using soap, water, and rubbing alcohol. A clean, smooth surface ensures the vinyl adheres perfectly, giving your project a flawless, professional finish that lasts.
Always measure twice and cut once. Cutting the vinyl too short can leave noticeable gaps, while extra material can be trimmed for a perfect fit. Taking your time ensures a seamless, professional-looking finish and helps you avoid wasting material.
Applying too much heat can warp the vinyl or damage your cabinets. Use gentle, even heat, especially around curves and edges, to allow the vinyl to stretch smoothly. Controlled heating prevents bubbles, wrinkles, and peeling, giving your project a polished, long-lasting appearance.
Patience is key.Take your time when applying vinyl wrap. Carefully smooth out bubbles, align edges precisely, and pay attention to every small detail. Rushing can lead to wrinkles, misalignment, or peeling over time. A patient approach guarantees a professional, durable, and long-lasting result while making the wrapping process less stressful.
Patience is key. Take your time smoothing bubbles, aligning edges, and finishing details to achieve a professional, long-lasting After completing your vinyl wrap, maintenance is simple:
With proper care, your vinyl wrap can last 5 to 10 years, keeping your kitchen looking fresh and modern.
While DIY vinyl wrap is achievable, there are situations where professional help is recommended. Complex curves, textured surfaces, or large appliances like refrigerators can be challenging to wrap without experience. Professionals have the tools and skills to ensure a smooth, bubble-free finish. If you are unsure, consulting an expert can save time and frustration. WrapStar is a professional and trusted expert in vinyl wrapping services, offering high-quality results for kitchens, cabinets, appliances, and more.
Applying a vinyl wrap yourself comes with several advantages:
DIY vinyl wrapping gives you control, creativity, and affordability all in one simple project. Satisfaction of completing a home project on your own
Yes, you can apply a vinyl wrap in your kitchen by yourself. With careful preparation, the right tools, and patience, you can achieve a stylish and professional-looking result. Whether you want to modernize your cabinets, refresh your countertops, or give appliances a new look, vinyl wrap offers a cost-effective and flexible solution.
Wrap Star helps you refresh your home or workspace with easy vinyl wrapping solutions for kitchens, bathrooms, doors, furniture, and more. With years of experience and a skilled team, we offer neat, clean work that gives your space a new look without big renovations.


